How to Screed a Floor - DIY Screeding Guide for Beginners

How to Screed a Floor: A Step-by-Step DIY Guide
If you're renovating a kitchen, installing underfloor heating, or levelling uneven subfloors, you’ve likely reached the screeding stage. Screeding a floor ensures a smooth, level base for your final flooring finish — but it's also a task that requires precision.
While hiring a professional screeding contractor is the most reliable option, many DIY enthusiasts choose to tackle the job themselves using widely available screed mixes and tools. Below, you’ll find everything you need to know about how to screed a floor, including choosing the right type of screed, preparing your subfloor, and applying the screed correctly.
Types of Screed and Choosing the Right One
Selecting the correct screed type is critical to the success of your flooring project. Here's a breakdown of the most commonly used screeds for domestic and commercial floors:
Unbonded Screed
Laid over a damp-proof membrane (DPM) rather than bonded to the subfloor. It offers good moisture protection but is more prone to curling.
Bonded Screed
Applied directly onto the substrate using a bonding agent (e.g., PVA, SBR, or epoxy resin). Ideal for thinner layers and areas with heavy foot traffic or load-bearing requirements.
Floating Screed
Similar to unbonded screed but laid on insulation or underfloor heating systems. Excellent for thermal efficiency and acoustic performance.
Other screeds like liquid self-levelling screeds are also available, but they typically require industrial equipment and expertise. This guide focuses on traditional sand and cement screed — the most practical option for DIY screeding.
Preparing the Floor for Screeding
Correct preparation depends on your chosen screed type.
For Unbonded and Floating Screeds
-
Clean the concrete base – Remove dust, dirt, grease, and debris.
-
Lay a damp-proof membrane – Use overlapping PVC or polythene sheets (20cm overlap), taping the seams and raising edges by 10cm against walls or pillars.
-
Install edge insulation – Apply compressible edging foam around perimeter walls and vertical structures to prevent cracking from thermal expansion or shrinkage.
For Bonded Screeds
-
Roughen the subfloor – Expose aggregate using a chipping hammer for better adhesion.
-
Clean the surface – Ensure it's free of contaminants like dust or oil.
-
Apply bonding agent – Follow manufacturer instructions for your chosen primer.
Mixing Your Screed
Before mixing, calculate your materials:
-
Area size – Use a screed calculator to estimate quantity.
-
Screed depth – Minimum 35mm for bonded, 50mm+ for unbonded/floating.
-
Use a 1:4 cement-to-sharp-sand ratio for a standard screed. For additional strength:
-
Add polypropylene fibres to reduce cracking.
-
Use steel mesh reinforcement embedded in the top half of the screed layer.
How to Screed a Floor (Step-by-Step)
- Divide the Floor into Sections
Use timber battens cut to screed height.
Fix them in place with a thin layer of screed and wet them slightly for easier removal.
- Apply the Screed Mix
Start at the farthest corner and work backward.
Use a trowel to spread and a hand tamper to compact around the edges.
- Level the Screed
Use a straightedge or screed board in a side-to-side sawing motion.
Slightly tilt the board so one corner acts as a cutting edge.
- Repeat and Fill Gaps
Continue section by section.
Remove the battens as you go and fill in the gaps with screed.
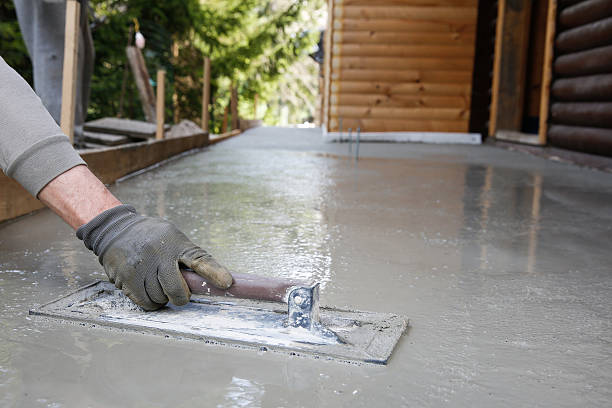
- Float the Screed
Use a bull float immediately after laying.
Repeat after bleed water evaporates to refine the surface.
- Cure the Screed
Cover with polythene for at least 7 days to retain moisture.
Extend curing time if temperatures drop below 10°C.
- Allow Screed to Dry
Traditional screed dries at 1mm per day under normal conditions.
Avoid tiling or foot traffic for at least 3 weeks.
Quick-drying screeds may be walkable in 24–48 hours but still require proper curing time.
Should You Hire a Professional Screeding Contractor?
While DIY screeding is possible, projects like wet rooms, underfloor heating, or large spaces demand precision. Poor screed can lead to costly repairs down the line. Hiring a professional floor screeding contractor ensures proper bonding, levelling, and curing — saving you time, money, and stress.
At The Concrete Flooring Company, we offer affordable, high-quality screeding services tailored to your specific project. Contact our expert team today to discuss your requirements or request a free quote.